Pads allow you to display model data on a collection of pages. Since a pad comprises multiple pages, you can display a lot of information without using up a lot of space on the diagram. You can easily turn pages in a pad to display the data you want to view.
You can create three different types of pads with iThink/STELLA: loop pads, graph pads, and table pads.
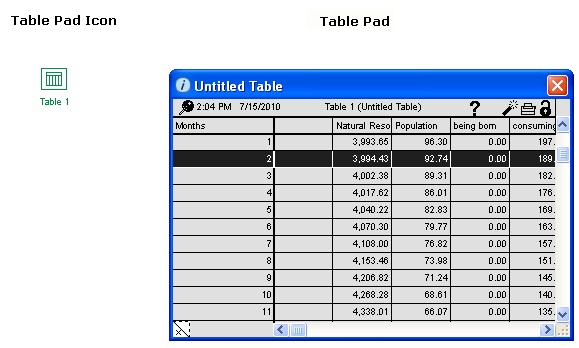
Each pad object is made up of a small pad icon, and the pad itself, as shown in the table pad example below.
The pad icon represents the pad in the model. The pad floats above/below the layer on which you place the pad icon. You can open and close a pad, resize it, pin it to the layer surface so that it stays where you put it, unpin it so that it floats again, turn pages in multi-page pads to view more data, and show or hide all currently open, floating pads.
Note: When you first place the pad, the pad itself hides the pad icon (which is helpful if you want to pin the pad in place). You need to either close the pad or move it to see the pad icon as you can in the above example.
The following sections describe how to work with pads by
Note: For general information on working with pad objects (placing, selecting, naming, etc.), see Working with objects.
Select the pad's icon, and then choose Open Selection from the Interface, Model, or Map menu.
–or–
Right-click the pad's icon, and then choose Open from the menu that appears.
–or–
Double-click the pad's icon in the diagram.
The pad opens.
Note: You cannot close a pinned pad. To close it, you must unpin it first.
Note: You cannot move a pinned pad. To move it, you must unpin it first.
 (in the lower-right corner of the pad) to make the pad larger or smaller.
 Note: You cannot resize a pinned pad. To resize it, you must unpin it first.
Pad names can be up to 65 characters long.
Note: You can also name and rename pages within pads. For more information, see Loop pads, Graph pads, and Table pads.
Type the new name:
Pinning a pad to a diagram layer makes the pad visible whenever you are viewing the layer on which it is pinned.
Pinned pads move along with the layer to which they are affixed when you click, drag, scroll, etc. on the layer.
Unpinned pads "float," either above or below the layer, and disappear from view when you click on the layer or navigate to another layer.
By default, pads are unpinned when you first add them to the diagram.
Notes: When a pad is pinned, you cannot move or resize it unless you first unpin it.
You cannot pin a pad to a layer other than the one on which it was added. For example, you cannot pin a graph pad added on the Interface layer to the Model layer. You can, however, view all unpinned pads regardless of the currently displayed layer by using the Show Pads command (for more information, see To show all unpinned pads).
If you are viewing an unpinned pad on a layer other than the one to which it belongs, the  is grayed out and you cannot pin it until you move it to the appropriate layer.
 icon in the pad's upper-left corner.
 icon in the pad's upper-left corner.
Use the paintbrush tool to change the color of pads. For more information, see Adding color to models.
If a pad contains more than one page, use the page turner  (in the pad's lower-left corner) to move between pages. If the pad has only one page, an "x" appears in the bottom triangle of the page turner
  .
.
The page number for the currently displayed page appears at the top of the pad for loop pads and table pads (next to the pad's name) and just above the page turner for graph pads.
Note: When you re-open a closed pad, it re-opens to the page that was displayed when the pad was closed.
Open, unpinned pads disappear from view when you click anywhere on the diagram or navigate from layer to layer.
You can tell when a pad is open, even if you can't see the pad, because the open pad's icon looks "grayed out".
![]()
By default, when you add a pad to a model, the pad icon is always visible, even when the pad is open or invisible.
You can choose to hide all pad icons in the model, or to show all pad icons.
For table and graph pads, you can lock any page in the pad. When a page is locked, the currently displayed values will not be overwritten during subsequent simulation runs until the page is unlocked.
Note: You cannot delete pad data with the dynamite tool while the page is locked.
 in the pad window.
 in the pad window.
You can print the contents of one or more pages for the selected pad by using any of the following procedures:
Select the pad, then, from the File menu choose Print Graph Pad, Print Table Pad, or Print Loop Pad.
–or–
Right-click the pad and then choose Print Graph Pad, Print Table Pad, or Print Loop Pad from the menu that appears.
–or–
Press CTRL+P (Windows) or Command-P (Mac).
–or–
 in the pad window.
 on the Interface, Map, or Model toolbar, and then click the upper triangle in the pad's page turner to delete the page.
To delete the currently displayed values from a graph or table pad, click  in the pad page (or right-click the pad and then choose Delete [Windows] or Clear [Mac] from the menu that appears).
Note: The is available in the pad page only if the pad is unlocked.
on the Interface, Map, or Model toolbar, and then click the item in the pad that you want to delete.To delete data from all graphs and tables in the model, from the Interface or Model menu, choose Restore > Graphs and Tables.
Note: Locked graphs and tables are not affected by this command.
 See Also