In addition to the Core Assemblies and any Custom Assemblies you have created locally, you can also make use of Assemblies that have been published to the isee exchange and design what assemblies show up to meet your current modeling needs.
In this section we will fist describe the consumption process for assemblies, then the process to make them available on the isee Exchange.
An assembly is a single .stmx or .itmx model that can be use to add structure to a model.
A bundle is a collection of assemblies, or a collection of categories which contain assemblies or other categories. Bundles can be shared with other people and used in the software as another source for assemblies.
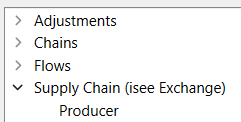
The Supply Chain bundle is from the isee exchange.
Categories allow you to organize the content of a bundle hierarchically. When used in the software, a category appears as contained within a bundle or another category.
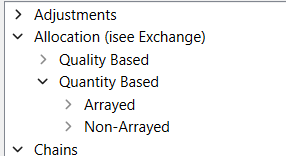
The Allocation bundle has categories Quality Based and Quantity Based with the latter have nested categories Arrayed and Non-Arrayed
Assemblies on the isee Exchange allow you to maintain a library of bundles on the exchange and choose which ones to include in the software. This will keep the set of assemblies currently in use on the desktop software tailored to your current modeling needs.
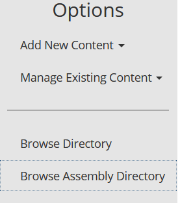
You can search for bundles by either browsing the main directory, or browsing the assemblies directory. Choose one from the menu at the left:
The assemblies directory will list only assemblies, the full directory will list assemblies, models, and simulation applications. When search you can set the filter to include assemblies:
![]()
When you see a bundle that might be of interest click on it to see its contents and add it to your account.

Click on Add this bundle to my account and it will be available for use on the desktop. You can set that use here, or on the manage my assemblies page.
To set which bundles you will include on the desktop go to the manage my assemblies using the menu on the left:
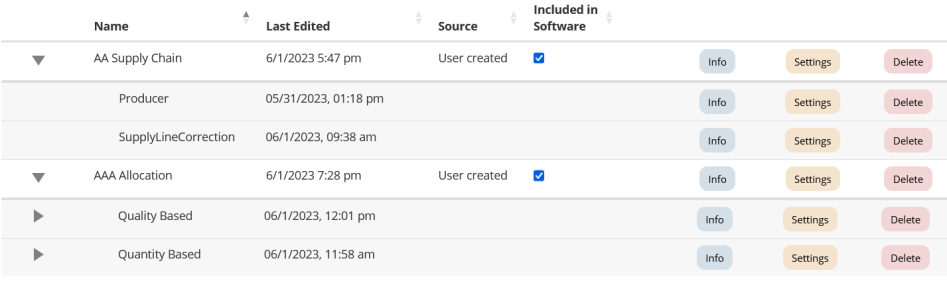
![]()
That page contains a list of bundles you have either created or found and included into your account. A small number of commonly useful bundles are also included by default.
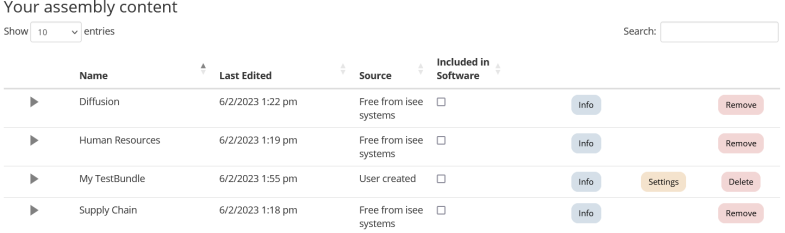
To include a bundle in your software check the box under that column (the effect is immediate, you do not need to confirm your choice). to see the contents of a bundle click on the triangle at the left. If the bundle contains categories you can expand those the same way.
If the bundle is your own there will be Settings button to change its settings, and a Delete button to delete it.
Note Deleting a bundle will also delete all the categories and assemblies it contains.
You can also edit or delete categories (including subcategories) or assemblies by expanding the bundle content using the triangle on the left. When you delete a categories all the subcategories and contained assemblies will also be deleted.
To use an exchange assembly that you have marked Included in Software as described above, you will need to set your isee Exchange credentials in Stella. This is done on the Preferences Dialog:

Once this is set up, each time you open the Assemblies Panel, Stella will check in with the isee Exchange to see if it needs to update the assemblies listed based on your settings on the exchange. This way each time include or exclude an assembly from the software it will be up to date. To force a refresh in Stella simply close and reopen the Assemblies Panel.
Assemblies coming from the isee Exchange will be identified in parentheses:
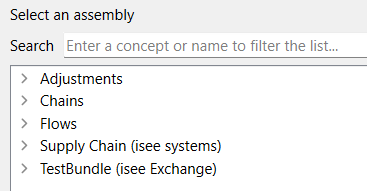
Here one of the default additions has been used as well as one of our own. TestBundle is our own on the isee Exchange, while Supply Chain is authored by isee systems, and also came from the isee Exchange.
You can use assemblies from the exchange alongside assemblies you have set up locally. In all cases the presentation will be alphabetical by bundle, and then alphabetical withing the bundles.
You can create Assemblies on the isee exchange by either by zipping and uploading a set of assemblies on your computer, or by uploading individual assemblies into an organization you set up on the exchange. In each case the assemblies are organized into a bundle, which may contain categories. A bundle can contain any number of categories, and the categories themselves can be nested to any depth.
To upload a bundle first prepare the assemblies and the containing directory as discussed in Custom Assemblies then create a zip archive of those files. The name of the archive will become the name of the bundle (you can change it) and any directory names will become category names (you can also change these). You can include both model files, and the supporting .txt file to allow customizations.
On he isee exchange first log in, then select Upload Assembly Bundle from the Add New Content menu at the left:
 .
.
Agree to the license under which others will access your bundle then click on Choose bundle and select the zip file you have prepared.
![]()
Upon completion, an overview of the bundle will be presented:
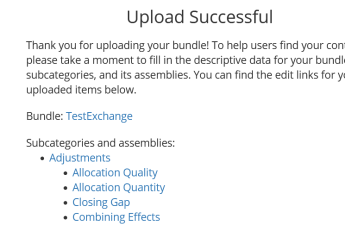
You can make changes and add additional description to the bundle and its categories as described below.
The process for adding bundles and categories is the same. First navigate to the manage my assemblies page from the menu on the left:
![]()
Then click on the button to create a new bundle or category:

Fill in the name and the description. To add a bundle leave the Assign to Bundle or Category dropdown at none, to create a category assign a parent bundle or category. You can always edit the parentage later, making a category a bundle, a bundle a category, or a category a child category.
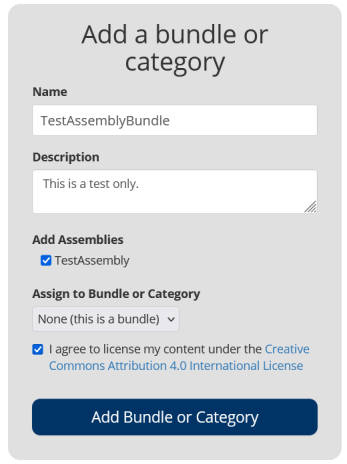
There will also be a list of assemblies you can include in the bundle or category. If you include an assembly that is already included in another bundle or category it will be moved. The list of assemblies is complete, and includes both assemblies contained within an uploaded bundle and those directly added to the isee Exchange.
To add an assembly click on the button to create a new assembly in the manage my assemblies page as described above:

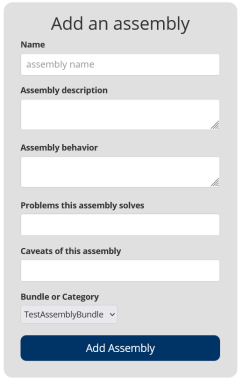
Fill in the name, a description, behavior generated, problem being solved and caveats of using the assembly. This information will be helpful to users when exploring assemblies on the isee Exchange and also used when searching assemblies. When adding an assembly you need to specify the bundle or category it will be added to, though this can be changed later. After clicking on Add Assembly you will be able to upload the .stmx or .itmx file containing the assembly.
Be sure that the file you upload has no errors or units warnings and that the units for time are one of Day, Month, or Year. This will make using it much easier.
Assemblies are edited from the manage my assemblies page. The bundles you have created will be listed in that page with expand buttons at the left.
Info will provide information about the component, Edit will allow you to edit it, and Delete will remove it. If the checkbox under included in software is checked, and you have specified your exchange credentials in he desktop software, the assembly will be included in your software as described under using exchange assemblies above. If you have added someone else's assemblies to your account there will be a remove button rather than a delete button and editing will not be possible.