This is an example of the flow used to create a model with assemblies. There is a video ![]() that walks through the steps shown here. There is an additional video
that walks through the steps shown here. There is an additional video ![]() that walks through using the aging chain with productivity assembly as well as one
that walks through using the aging chain with productivity assembly as well as one ![]() that demonstrates model building in the suggest view without adding any assemblies.
that demonstrates model building in the suggest view without adding any assemblies.
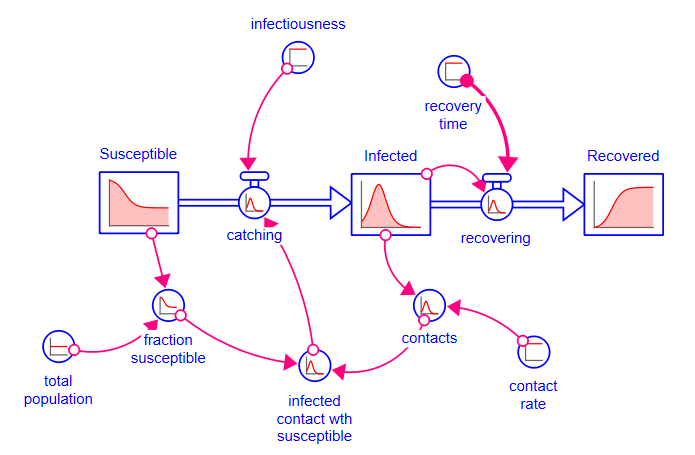
In this example we will create a simple infectious disease spread model using assemblies. This is often called an SIR( for Susceptible, Infected, Recovered) model. The model we develop here varies slightly from the more traditional construction that explicitly calls out contacts and contacts with susceptible as separate converters, though it has the same behavior. Using assemblies, the formulation we will use is somewhat easier to conceptualize and understand as the distinction between contacts and infections, as well as their related units of measure, is something many struggle with. The analogous contact based model is shown at the end for comparison.

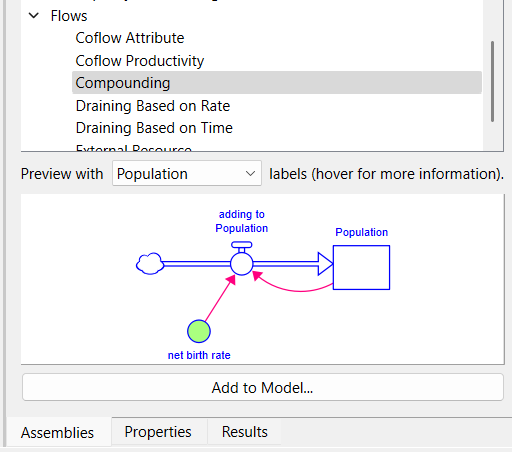
We are looking for a process of infected people causing more infections by coming in contact and transmitting a disease. This is positive feedback, and the assembly that does just that is called compounding. You can scroll through the list of assemblies on the Assemblies Panel (it is under Flows) or type compounding into the search box to filter out other assemblies.
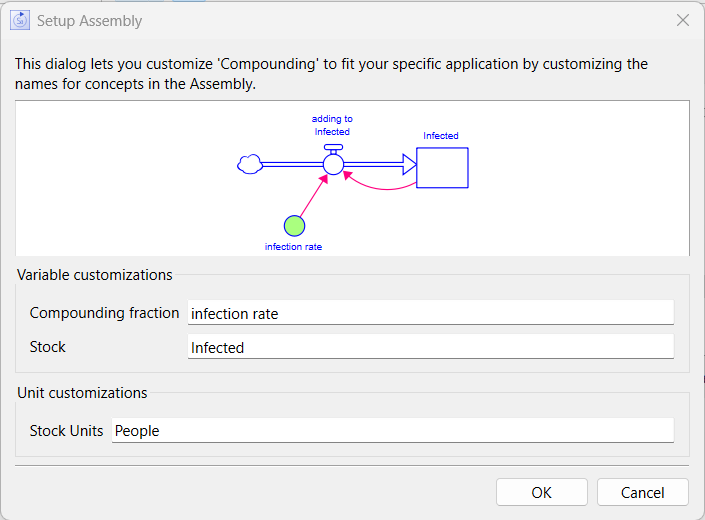
In the Assembly Customization Dialog that comes up after you click on the add to model button above, change Stock to infected and Compounding fraction to infection rate (leave the Stock units as people):
Click on OK to add the assembly. The cursor will change to ![]() . Since the model is empty click roughly in the middle to place the assembly.
. Since the model is empty click roughly in the middle to place the assembly.
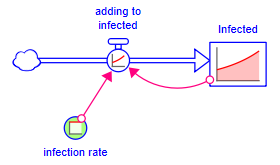
When the assembly is placed, you will be able to see its behavior.
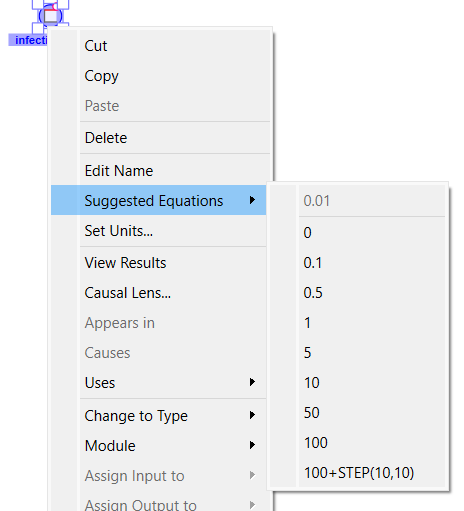
Infections can occur very rapidly. We want to change the infection rate from 0.01 per day (the assembly setting) to 0.5 per day. To do this right click on infection rate, move to the Suggest Equation menu item and then click 0.5 in the submenu.
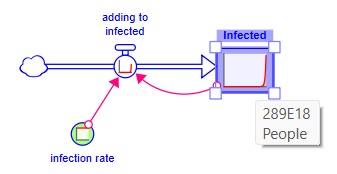
Do the same thing to infected setting its value to 1 (it is a stock so this will set the initial value). The model has the same behavior, but if you hover over infected you will see a very big number:
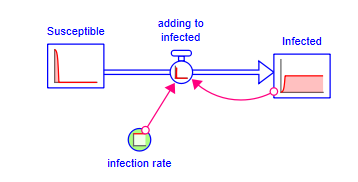
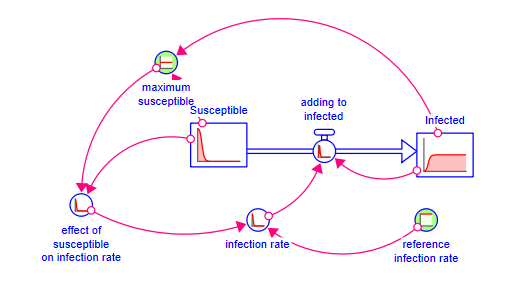
Clearly that is not a reasonable number of infected people. The flow into this level must stop when there are no more susceptible people. To show this click on the stock tool ![]() in the Model Build Toolbar and place the stock on the cloud at the left. Depending on your settings for stock or non-negative stock you will see something like:
in the Model Build Toolbar and place the stock on the cloud at the left. Depending on your settings for stock or non-negative stock you will see something like:
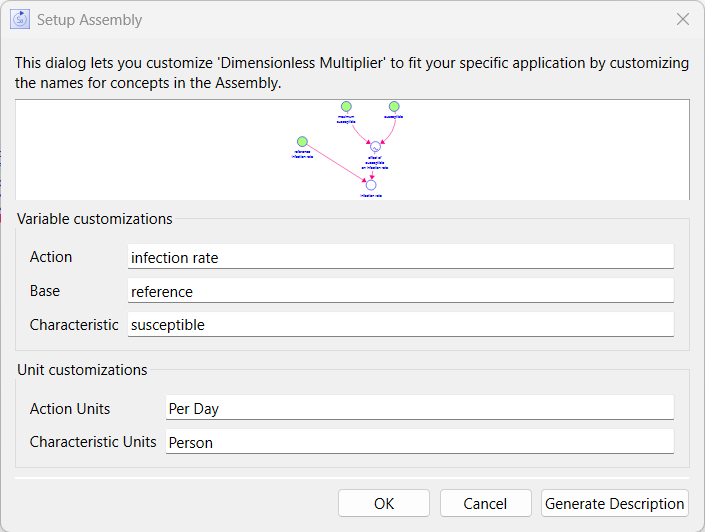
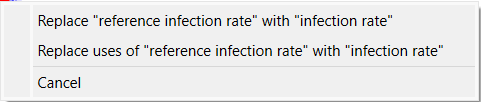
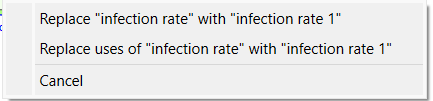
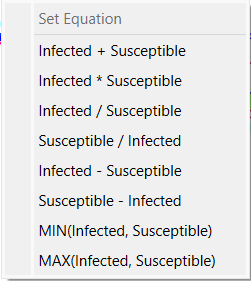
While this is more reasonable, the abrupt cutoff is not right. As the number of susceptible people goes down, it drops the number adding to infected. The dimensionless multiplier is an assembly that can be used to show this diminishing effect. Select it in the assembly panel and choose crowding as the example Than click on add to model and set action to infection rate, base to reference, characteristic to susceptible, action units as per day and characteristic units as person:
Then you add it to the model you will see two of the variable names are changed to prevent conflict.
Your model should look something like:
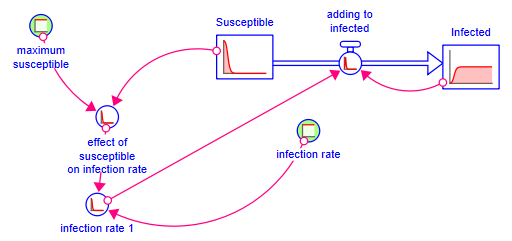
Your model should look like:
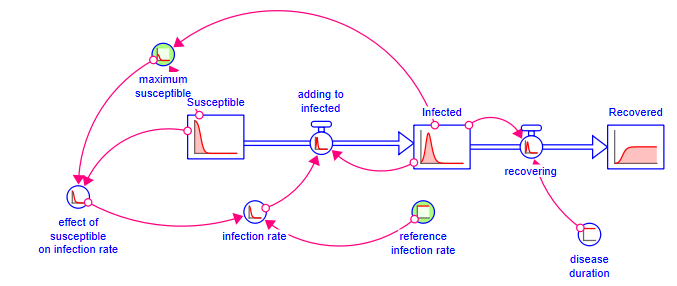
That's it - you have created a simple SIR model. Click on ![]() in the toolbar and spin disease duration till it is less than 2. What happens to the epidemic?
in the toolbar and spin disease duration till it is less than 2. What happens to the epidemic?
The below model generates the same behavior but explicitly identifies contact between infected and susceptible individuals as the way in which the disease spreads.