Graphics frames
Graphics frames give you the ability to visually organize and annotate your model. You can use them to frame objects such as input/output devices and buttons. You can also use them to display imported pictures, graphics, and QuickTime movies.
The following sections describe how to work with graphics frames by
To place a graphics frame on the diagram
- On the Interface, Map, or Model layer toolbar, click the graphics frame
 tool.
tool.
-
Click the diagram to place the graphics frame.

Note: The default size of the graphics frame is determined by the target page size, as defined in the Page Size and Runtime Options dialog box.
-
To specify properties for the text box and to format the text inside the text box, select the text box and then double-click the text box border, or right-click the border and then choose Open from the menu that appears.
The Text Box dialog box opens.
- Use the options in the Text Box dialog box to define the properties of the text box and format the text.
For more information about placing and editing knobs, see Working with objects.
To select a graphics frame
- Click within the graphic frame's border. The graphic frame is highlighted.
To move a graphics frame
- Click and hold inside the graphic frame's border.
- Drag the graphics frame to the desired location.
To resize a graphics frame
- Select the graphics frame that you want to resize.
- Click and drag one of the four resize handles that appear at the corners of the graphics frame.
- When the graphics frame is the size you want, release the mouse button.
To view or edit a graphics frame's properties
-
Double-click the graphic frame's border, or select the graphics frame and then choose Open Selection from the Interface, Map, or Model menu (or right-click the graphics frame and then choose Open from the menu that appears).
The Graphics Object dialog box opens.
- Use the options in the Graphic Object dialog box to edit the graphics frame's properties.
- When you are finished, click OK.
To add a picture into a graphics frame
You can import a picture into a graphics frame either by navigating to and selecting an image file from within the Graphics Object dialog box, or by dragging and dropping an image file from your computer onto the graphics frame.
Both procedures are described below.
To import a picture from within the Graphics Object dialog box
- Open the Graphics Object dialog box for the graphics frame into which you want to import a picture.
-
Click the Import Picture button.
The Open Image File dialog box opens.
- Navigate to and select the image file that you want to import.
-
Click Open.
- Click OK to close the Graphics Object dialog box.
To import a picture by dragging and dropping
- Drag an image file from anywhere on you computer onto the graphics frame. You can drag an image from your desktop, a browser, the Finder (Mac) or Windows Explorer (Windows), or any other location on your computer.
-
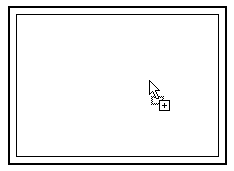
When the graphics frame is highlighted with a border and the pointer changes to + (as shown below), release the mouse button to drop the image into the graphic frame.
To add a movie to a graphics frame
You can add a movie to a graphics frame by using the options in the Graphics Object dialog box.
Notes: To assign a movie to a graphics frame, your computer must have QuickTime installed.
For best results, put all movie files in a directory entitled "movies", located in the same directory as the model file.
- Select the graphics frame to which you want to add a movie.
-
Double-click within its border, or choose Open Selection from the Interface, Map, or Model menu (or right-click the graphics frame and then choose Open from the menu that appears).
The Graphics Object dialog box opens.
- Use the following options to add a movie:
-
To assign a movie to the graphics frame, click the Assign Movie button, and then navigate to and select the QuickTime (.MOV) movie file you want to use. The first frame of the selected movie will be displayed in the center of the graphics frame.
Note: If you have already assigned a movie to this graphics frame, an asterisk (*) appears on the Assign Movie button.
- To resize an imported movie so that it fits the graphics frame, select the Size to Frame check box.
- To delete an assigned movie and remove it from the graphics frame, click the Delete Movie button.
- Click OK.
To play a movie in a graphics frame
Note: Although you can assign movies to more than one graphics frame in a model, you can play only one movie at a time.
- To play a movie, double-click the movie image inside the graphics frame.
- To pause a movie, click once on the movie.
- To resume a paused movie, double-click the movie.
- To stop a movie, click outside the graphics frame.
Notes: The movie does not have any connection to the model or its performance.
 See Also