The graphical input device (GID) enables model users to
When you add a graphical input device to the Interface layer of your model, you define it by associating it with a flow or converter that has been defined as a graphical function on the Model layer.
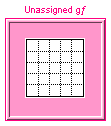
Notes: You can add a graphical input device only on the Interface layer.
You can associate only one graphical input device with each graphical function; once you've assigned a graphical function to a graphical input device, you can't assign it to a second one.
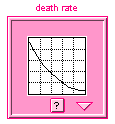
A defined graphical input device displays a small version of the graph that represents the associated graphical function.
When you run the model, a small arrow travels up and down on the left side of the graph to indicate the current "Y" value of the graphical function. The position of the arrow moves over the course of the simulation.
This animation allows model users to gain an understanding of what's happening during a simulation. It is also helpful when you are debugging your models because it allows you to see at a glance which of the graphical function relationships in your model are operating "within bounds" and which are not.
Model users can open the graphical input device to view and/or edit the graph data, view the documentation (if any) for the associated graphical function, and navigate to the associated graphical function on the Model layer.
 .
.Click the diagram to place the graphical input device.
To specify the properties for the graphical input, double-click the graphical input device icon, or right-click the icon and then choose Open from the menu that appears.
The Graphical Input Device dialog box opens.
For more information about placing and editing graphical input devices, see Working with objects.
Note: You can select to have the name of the associated graphical function displayed above the graphical input device, but you cannot otherwise define or edit the graphical input device's name.
Select the graphical function that you want to associate with the graphical input device.
When you are finished, click OK.
The defined graphical input device appears on the Interface layer and displays the graph for the graphical function.
Graphical functions that are associated with a graphical input device display a small graph icon  to help remind you that the entity is associated with a graphical input device.
Double-click the graphical input device (or right-click the icon and then choose Open from the menu that appears).
The Graphical Function dialog box opens.
After you've added and defined a graphical input device, you can open the Graphical Function dialog box to view the details of the associated graphical function.
While viewing the graphical function details, you can edit the graph or the data for the graphical function in the dialog box. Changes you make here, however, do not modify the actual graphical function relationship. Editing the graph here allows model users to explore alternative relationships during a scenario analysis, while preserving the original relationship.
Notes: To edit the actual graphical function, you must select the graphical function entity on the Model layer and then use the Graphical Function panel to make changes.
You can edit and restore graphical input devices only when the model simulation is stopped. When the model is running or paused, the graphical input device cannot be opened and its restore (U) button is disabled.
Double-click the graphical input device icon.
The Graphical Function dialog box opens.
When you are finished, click OK.
If you made any changes to the graphical function, a restore (U) button appears on the graphical input device.
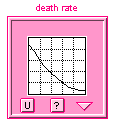
To restore the graphical input device to the settings of its associated graphical function, click the restore (U) button.
Tip: To restore all graphical input devices in the model to their original values, use the Restore > Graphical Inputs command on the Interface and Model menus.
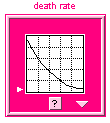
If the associated graphical function has documentation specified for it, a documentation (?) button appears at the bottom of the graphical input device.
To view the documentation for the graphical function, click the documentation (?) button.
The documentation appears in a pop-up window.
If the graphical input device was defined to include a navigation button (by selecting the Show Navigation Arrow check box in the Graphical Input Device dialog box), a navigation ( ) button appears at the bottom of the graphical input device.
To navigate to the associated graphical function on the Model layer, click the navigation () button.
The software displays the Model layer and highlights the entity icon for the associated graphical function.
 Tell me how
 button. The graphical function's name turns gray in the "Allowable" list.
 button.
 See Also