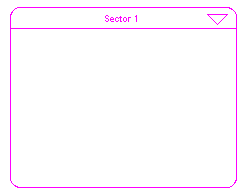
Process frames are a type of high-level mapping tool for the Interface layer.
Process frames allow you to represent detailed model processes at a high level on the Interface layer. Like the bundled connector and bundled flow, the process frame allows you to use a "top-down" approach when building or navigating in models.
You can also use process frames to display graphical images or to play QuickTime movies.
Note: If the
When you place a process frame on the Interface layer with the Link High-Level Map to Model check box selected, it looks like this:

The following sections describe how to work with process frames by
Note: If the Link High-Level Map to Model check box is selected in the Interface Preferences dialog box, a process frame is automatically created on the Interface layer when you place a sector frame on the Map or Model layer (and vice versa). Similarly, if you delete a process or sector frame, its linked sector or process frame is also deleted.
 tool.
tool.Click the diagram to place the process frame.
Note: If you try to place a process frame where it will overlap another process frame, a message appears to tell you that there is not enough room to place the process frame in that location. To place the process frame, either move it to a different location or move/resize the other process frame so there are no overlaps.
Drag the process frame to the desired location.
Note: The software will not allow you to move a process frame to a location where it overlaps another process frame.
Type the new name:
Notes: You can also edit the name for a process frame by editing the name in the Name box in the Process Frame dialog box.
If the process frame is linked to a sector frame, the sector frame is automatically renamed to match the new process frame name.
A process frame's properties include its name, comments, border style, and whether the process frame displays a picture, movie, and its header.
Double-click the process frame's border or within its header area, or select the process frame and then choose Open Selection from the Interface menu (or right-click the process frame and then choose Open from the menu that appears).
The Process Frame dialog box opens.
You can add a picture to a process frame by dragging and dropping an image file from your computer onto the process frame, or by using the options in the Process Frame dialog box.
Notes: For Macs, you can import PICT files; for Windows machines, see Supported graphic file formats for a list of supported Windows image formats.
For best results, put all picture files in a directory entitled "graphics", located in the same directory as the model file.
Drag an image file from any location on your computer onto the process frame.
When a black border appears around the process frame and the pointer changes to a "+", release the mouse button to drop the image onto the process frame.

–Or–
Double-click its border or within its header area, or select the process frame and then choose Open Selection from the Interface menu (or right-click the process frame and then choose Open from the menu that appears).
The Process Frame dialog box opens.
To have the process frame's name appear as the picture in the process frame, select the Use Name option, and then click the Import Picture button to format the text in the Text Box dialog box.
Note: To edit the name that appears as a picture in the process frame, edit the process frame's name in its header or in the Name box of the Process dialog box. For more information, see To rename a process frame.
To import a picture from the clipboard to appear in the process frame, make sure that you have copied the image you want to the clipboard by using the Copy command, then select the From Clipboard option, and click the Import Picture button.
Tip: If you have copied a picture to the clipboard, you can also paste the picture to the process frame by choosing Paste from the Edit menu.
You can add a movie to a process frame by using the options in the Process Frame dialog box.
Notes: To assign a movie to a process frame, your computer must have QuickTime installed.
For best results, put all movie files in a directory entitled "movies", located in the same directory as the model file.
Double-click its border or within its header area, or select the process frame and then choose Open Selection from the Interface menu (or right-click the process frame and then choose Open from the menu that appears).
The Process Frame dialog box opens.
To assign a movie to the process frame, click the Assign Movie button, and then navigate to and select the QuickTime (.MOV) movie file you want to use. The first frame of the selected movie will be displayed in the center of the process frame.
Note: If you have already assigned a movie to this process frame, an asterisk (*) appears on the Assign Movie button.
Note: Although you can assign movies to more than one process frame in a model, you can play only one movie at a time.
Notes: The movie does not have any connection to the model or its performance.
If the Link High-Level Map to Model check box is selected in the Interface Preferences dialog box, placing a process frame on the Interface layer automatically places a linked sector frame on the Map and Model layers.
Use the following procedure to navigate from the process frame to its linked sector frame:
 .
.