Start isee NetSim by double-clicking the ![]() on your desktop.
on your desktop.
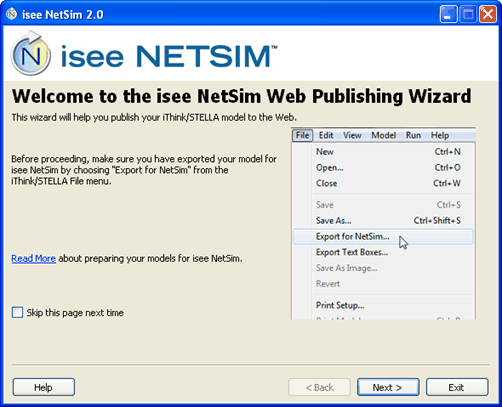
The first page of the NetSim Web Publishing wizard opens.

This page provides an introduction to the process and reminds you that you need to first export your model in order to publish it with isee NetSim.
Note: You can hide this page in the future by selecting the Skip this page next time check box.
Click Next.
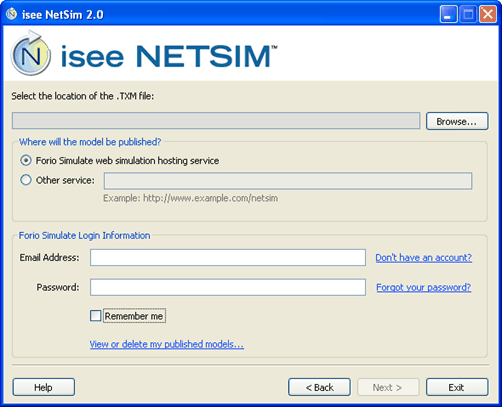
The second page of the wizard appears.

- To publish the model to Forio Simulate, select Forio Simulate web simulation hosting service. Forio Simulate provides free hosting for iThink and STELLA models with up to 400 equations. For more information about Forio Simulate hosting options, visit www.forio.com/simulate_overview.
-
To publish the model to any other web site, select Other service and then type the full URL of the web site where you want to publish the model.
Note: If your Internet connection goes through a proxy server, see "isee NetSim for Internet proxy server connections" at www.iseesystems.com/iseenetsim/2.0/help/index.asp#proxy on the isee systems web site.
In the next section, type your email address and the password for the location where you want to publish the model.
Notes: If you do not yet have a Forio Simulate account, click the Don't have an account? link to create an account by providing your name, email address, and a password.
If you have already created an account but have forgotten your password, click the Forgot your password? link. You will be prompted to enter your email address so that your password can be emailed to you.
To save your login information for the future, select the Remember me check box.
Note: If you have already published one or more models, you can see a list of your published models by clicking the View or delete my published models link. A web page appears that displays a list of your published models. Use this page to view or delete your published models.
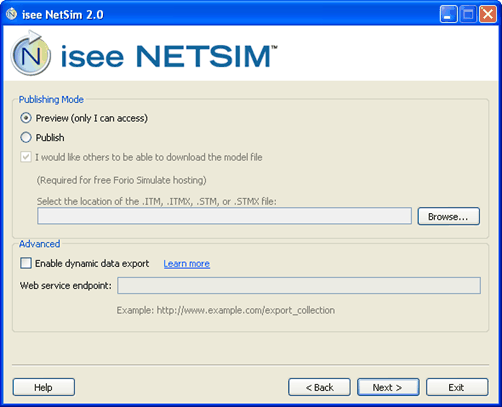
Click Next. The third page of the wizard appears.

- To publish the model to a temporary location that only you can access, select Preview.
- To publish and save the model to a location where it can be shared with others, select Publish. If you would like others to be able to download the model file, select the check box and then click the Browse button to navigate to and select the model (.ITMX or .STMX) file.
If you have defined one or more dynamic export links in your model and you have written a custom web service program to collect the exported data, you can select the Enable dynamic data export check box to enable this functionality for the model you are publishing.
Note: This option is available only if you are publishing a model file that contains dynamic export links.
If you select this check box, use the Web service endpoint box to specify the full URL of the web service program. The URL is the web page (resource) that will process the data and either store it in a database or write it to a file for a later viewing.
Notes: The web service you specify here must be one that responds to an HTTP POST that contains model simulation data in JSON format. For more information about how to set up the web service endpoint, visit http://www.iseesystems.com/iseenetsim/2.0/help/DynamicExportService.
If you have multiple dynamic data export links in the model, only the first one will be used by isee NetSim to export data.
Click Next.
The next page of the wizard appears, which displays the status of the publication process. isee NetSim logs in to the specified site and publishes the model.
Once isee NetSim has finished publishing the model, the simulation launches in your browser.
 See Also