To allow others to view your private or authenticated Sim you must invite them through the User Groups tab. If your invitees do not already have an isee Exchange account, they will be prompted to create one once you have invited them.
First go to the isee Exchange at https://exchange.iseesystems.com/login and sign in:
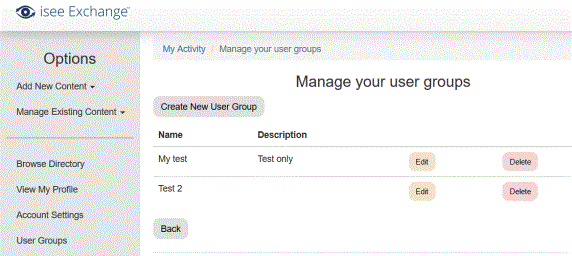
Click on the User Groups item at the left so that you can create user accounts for those with whom you want to share the Sim.
Then click on the Create New User Group button.
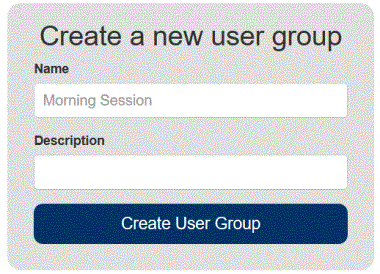
Enter a name for the group of users that you want to see the authenticated Simulation.
You can also add a description, if desired. Click on Create User Group.
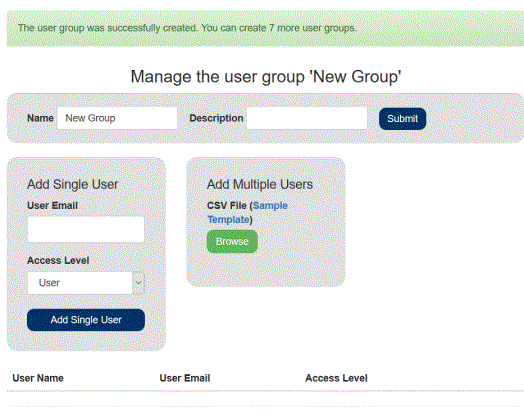
Here you can either add one or multiple users.
After you enter the user’s email address, if their address is not already associated with an existing account on the isee Exchange, an email will be sent with a request to create an account to view your Simulation.
The user can complete the account set-up by adding a password.
To add multiple users, you can select a .csv file that has a list of users.
Once you have added the user(s), the last step is to add the User Group to the authenticated Sim.
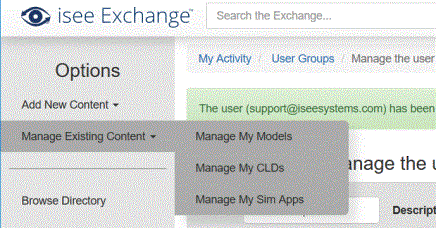
Select Manage Existing Content>Manage My Sim Apps from the menu at the left:
Select the Settings button for your authenticated sim.
![]()
In the Or Change Other Settings group select Manage Authentication:

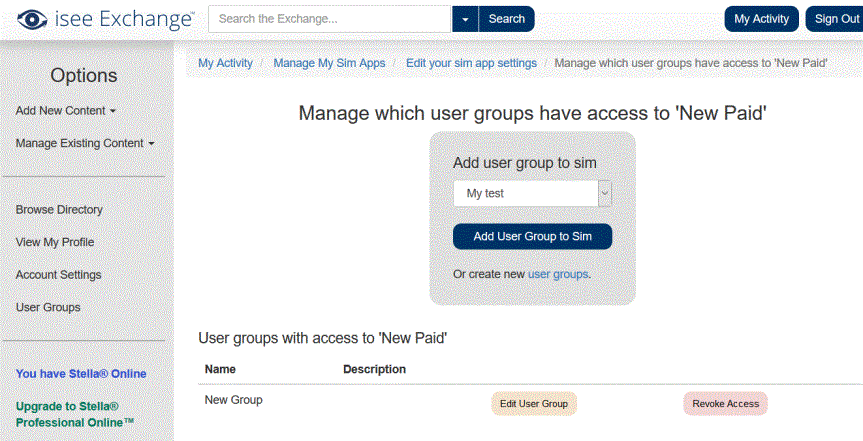
Find the name of the new User Group in the drop list (there may only be one) and select Add User Group to Sim.
Then it will look like this:
Now the users that are part of the group will be able to see the Authenticated Sim in their list of Sims.